 Sponsored Links
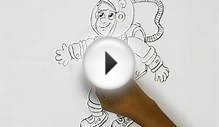
This astronaut cartoon character is the perfect illustration to help you depict an environment filled with clouds, wide spaces and cool special effects! Indeed, you don't need to be in orbit to enjoy the beauty of the universe. This cute character can do the job for you quite easily!
In this fun drawing lesson, I will show you how to create a simple astronaut dressed in a simple suit and colored with great shadows and colors (well, the character is mostly white and grey!). Don't hesitate to grab a vector software to achieved this tutorial. It's quite easier to use one to create nicer illustrations!
 Important note: For each step available below, the first image represents the operation you must perform for this particular step. All changes are surrounded by a red outline.
On the second image, you will have the opportunity to see the result of this particular step.
Step 1
Let's start this small drawing lesson by creating the character itself. Just use a few black outlines to draw the main elements. Once you are done, add a few basic colors to your astronaut. As you can see, it doesn't matter if the illustration looks plain and flat for now.
Step 2
Then, select the gradient tool and add a few shadows on most parts of your cartoon character. To make your illustration easier to read, notice how the pants are slightly darker while the arms and helmet are lighter. You can use a circular fill for the eyes and a linear one for the other parts of the illustration.
 Step 3
It's now time to add some great shadows on your astronaut cartoon. First, draw a circular shape on the left side of the head to represent the shadow created by the helmet. Then, create small circles to form reflections on the eyes and the pupils. Darker shapes can be created behind the eyes to make them more readable.
Step 4
 Add some shadows on the feet, the bottom of the helmet and the left side of the helmet. You can also duplicate the helmet, color it with a dark grey color, reduce the size of this new shape (just a little bit) and place it behind the helmet.
Step 5
For the final step, close the helmet using a light blue shape. You can use transparency to make the top part more visible. You can also add some shadows on the arms and the legs using new shapes and a few gradient effects. Good job! I think this character is ready to travel into space!
RELATED VIDEO


